Microsoft Azure AZ-104 Virtual Machine Day-5 Bootcamp
What is a Azure virtual machine?
Azure VMs are one of several types of on-demand, scalable computing resources that Azure offers. With VMs, you have total control over the configuration and can install anything you need to perform the work. You don't need to purchase physical hardware when you need to scale or extend your datacenter. Finally, Azure provides additional services to monitor, secure, and manage updates and patches to the OS.

Azure Virtual machine will let us create and use virtual machines in the cloud as Infrastructure as a Service. We can use an image provided by Azure, or partner, or we can use our own to create the virtual machine.
Virtual machines can be created and managed using:
- Azure Portal
- Azure PowerShell and ARM templates
- Azure CLI
- Client SDK's
- REST APIs
Features and Capabilities
Azure Virtual Machine Scale Sets
Azure Virtual Machine Scale Sets enable users to manage and scale up to thousands of virtual machines on both Windows and Linux platforms. Customers can generate and deploy thousands of VMs while enjoying intrinsic autoscaling and load balancing capabilities powered by centralized templates.
They also enjoy a selection of VM images and consumption models that satisfy their needs, as well as complete control of individual VMs in a scale set.
Azure Compute
Azure compute gives users the ability to access a diversified Azure VM portfolio through a wide scope of compute options. These virtual machines are capable of accommodating vast workloads, including the applications users create.
Flexible Pricing
Azure Virtual Machines use an economical approach in per-second billing to allow users to pay only for the compute time they use. Users can also optimize their infrastructure and reduce costs through one-year or three-year Azure Reserved Virtual Machine Instances terms.
Pricing flexibility extends to spot pricing on virtual machines and scale sets to execute interruptible workloads at great discounts in comparison to pay-as-you-go offerings.
Why Use Azure Virtual Machines?
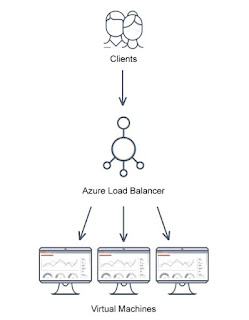
Scalability and Load Balancing
Through distributing workloads across various virtual machines, VMs expedite application scaling. Azure Virtual Machines have autoscaling features that simplify and improve scaling to thousands of VMs. And Azure’s load balancing capabilities distribute traffic between virtual machines, regardless of whether they are internet-facing or not.
Agility
The ability to manipulate servers akin to data shows the impact of virtualization technology. Users can deploy what was previously a predominantly physical resource as software in a handful of minutes. By providing rapid deployment ability, users enjoy the agility to meet and reconfigure organizational and infrastructure needs.
Out-of-the-Box Tools
Azure VMs provide prebuilt templates and out-of-the-box tools that save time for users, greatly improving their processes. They are also highly customizable and accessible across numerous internet-connected devices.
Enhanced Organizational Efficiency
The time and energy IT teams need to maintain VM host machines is much less than the time invested in hardware maintenance. As such, IT teams can spend more time in other productive tasks, improving efficiency.
Creating Azure Virtual machine in Azure Portal
Step 1: Click on All services and then click on the Virtual machine button, as shown in the following image.
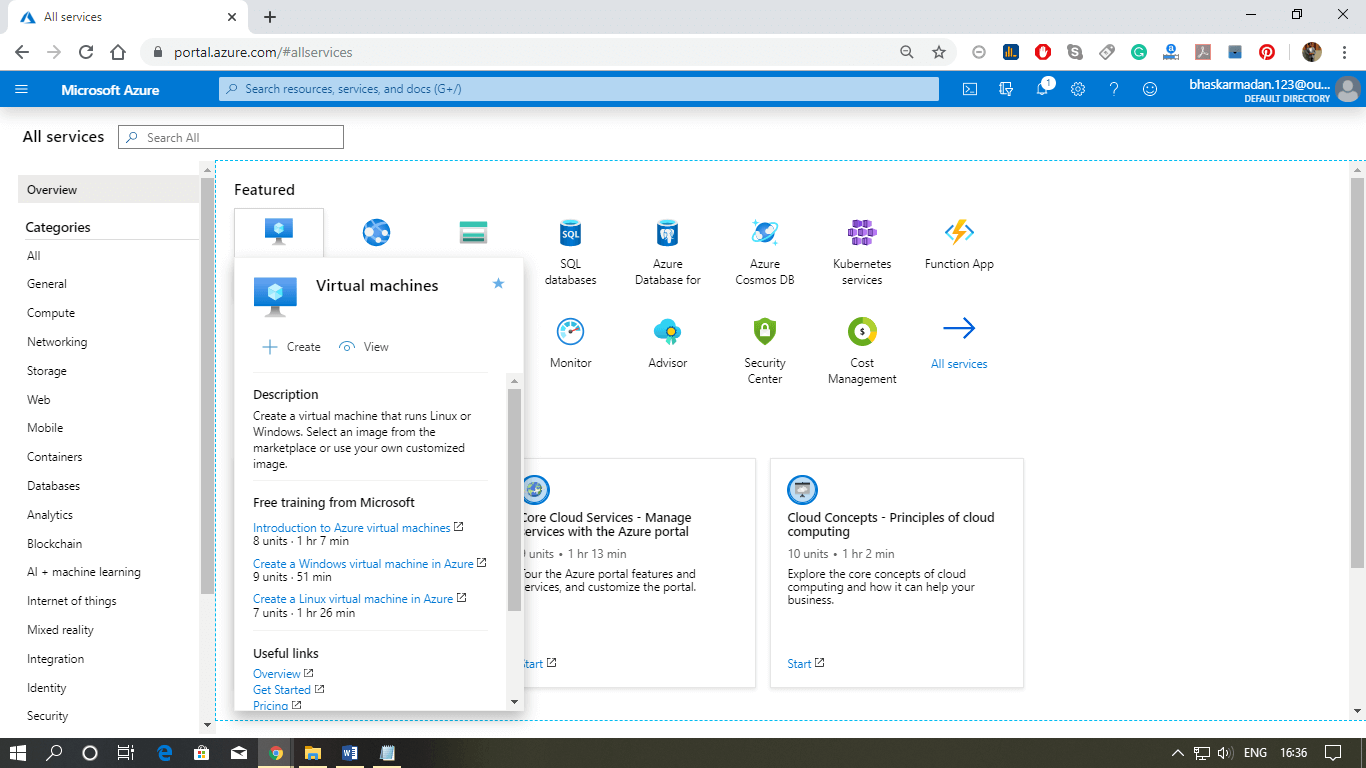
Step 2: Click on create, then you will be redirected to the Create Virtual machine page.
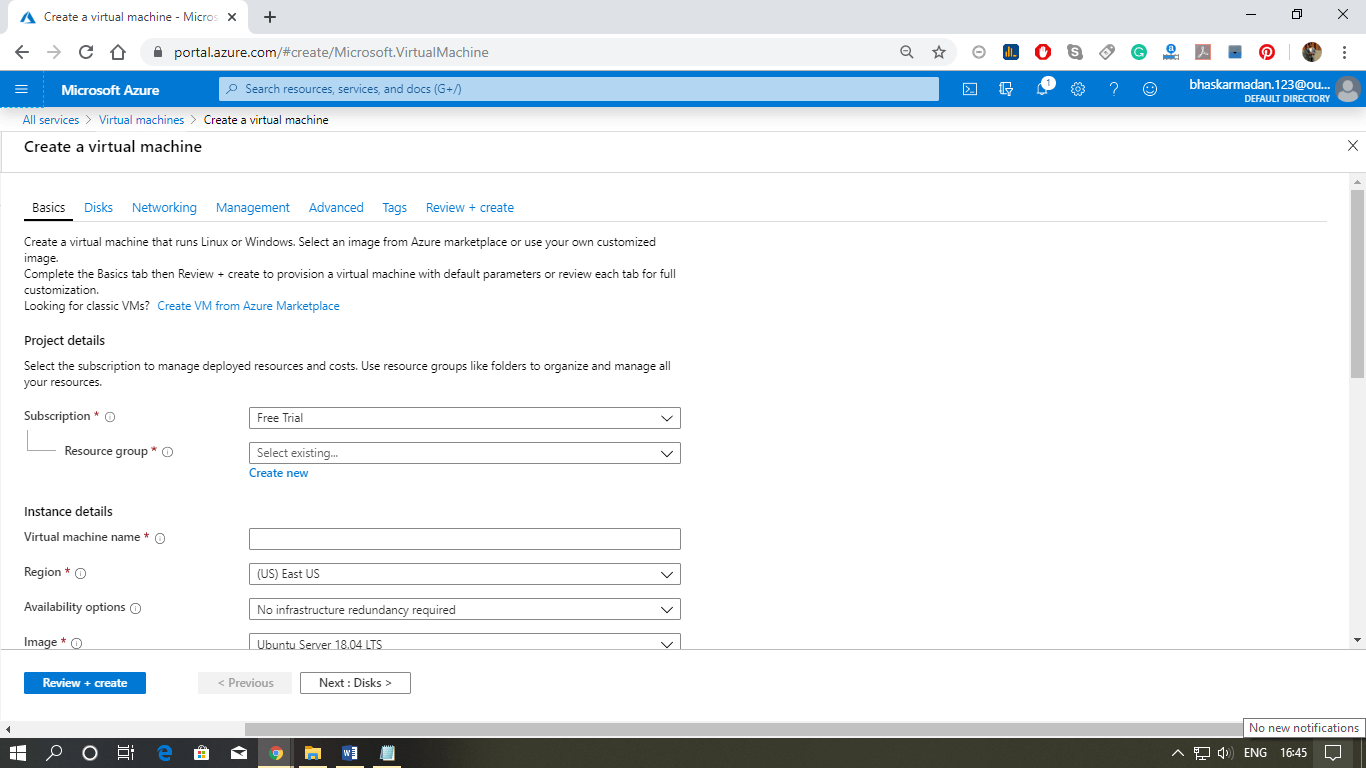
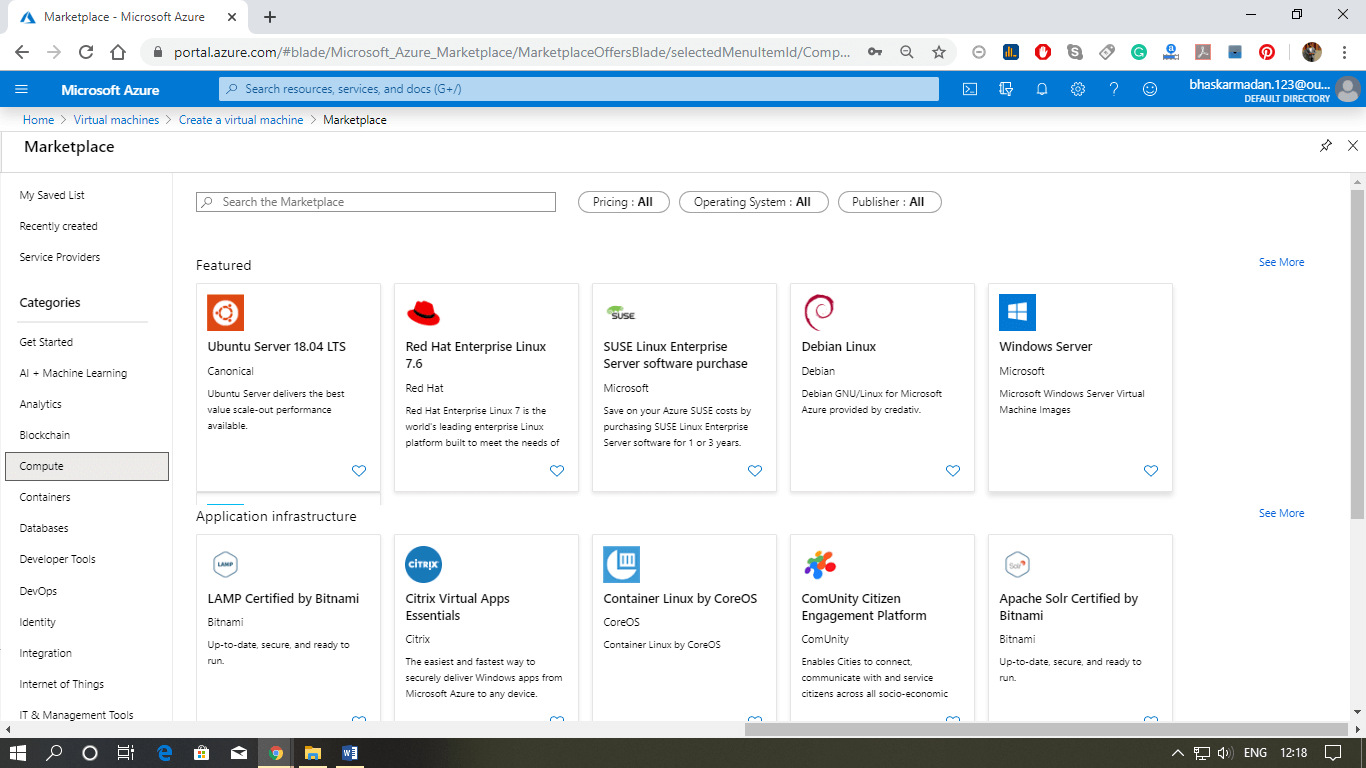
Step 3: Now, select the image for your virtual machine from the Azure marketplace by clicking on "Create VM from Azure marketplace".
Step 4: After selecting the image, the first thing you need to do is to provide a name to your virtual machine.
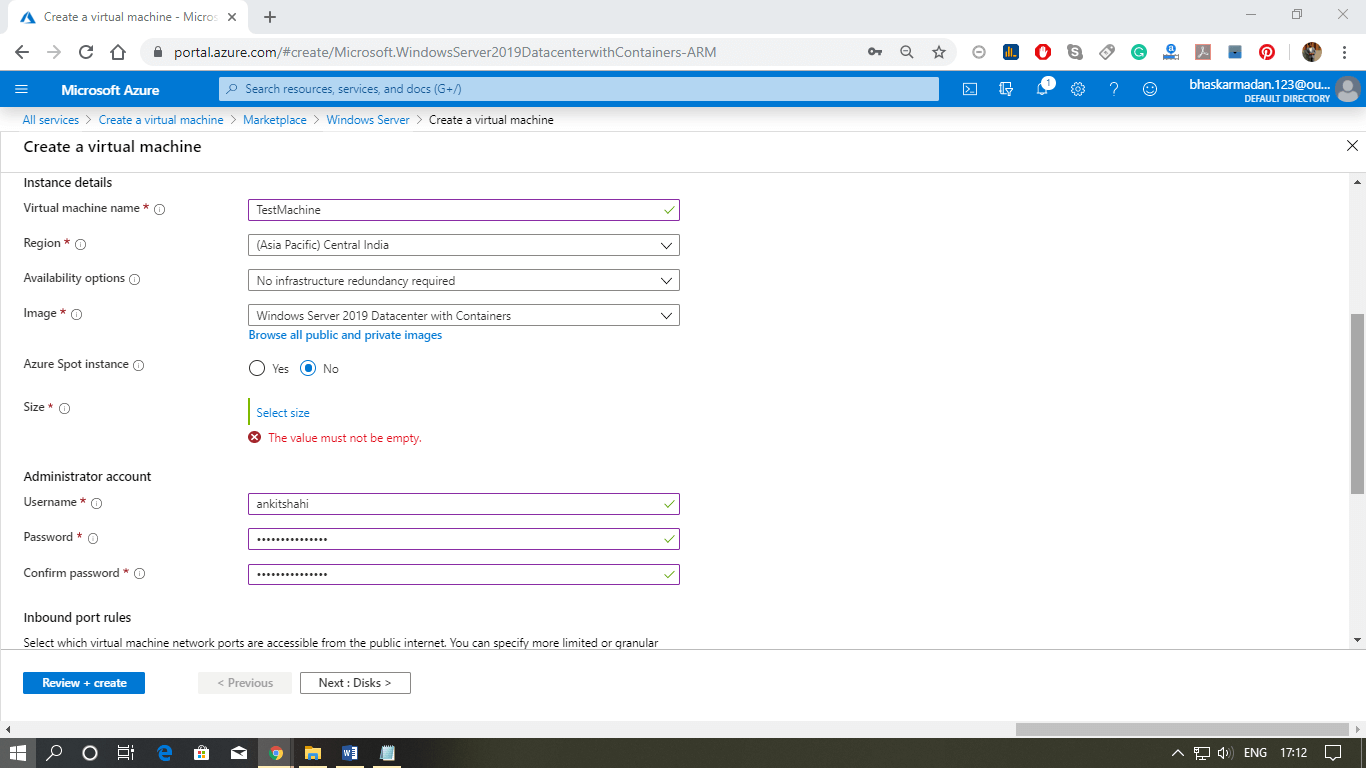
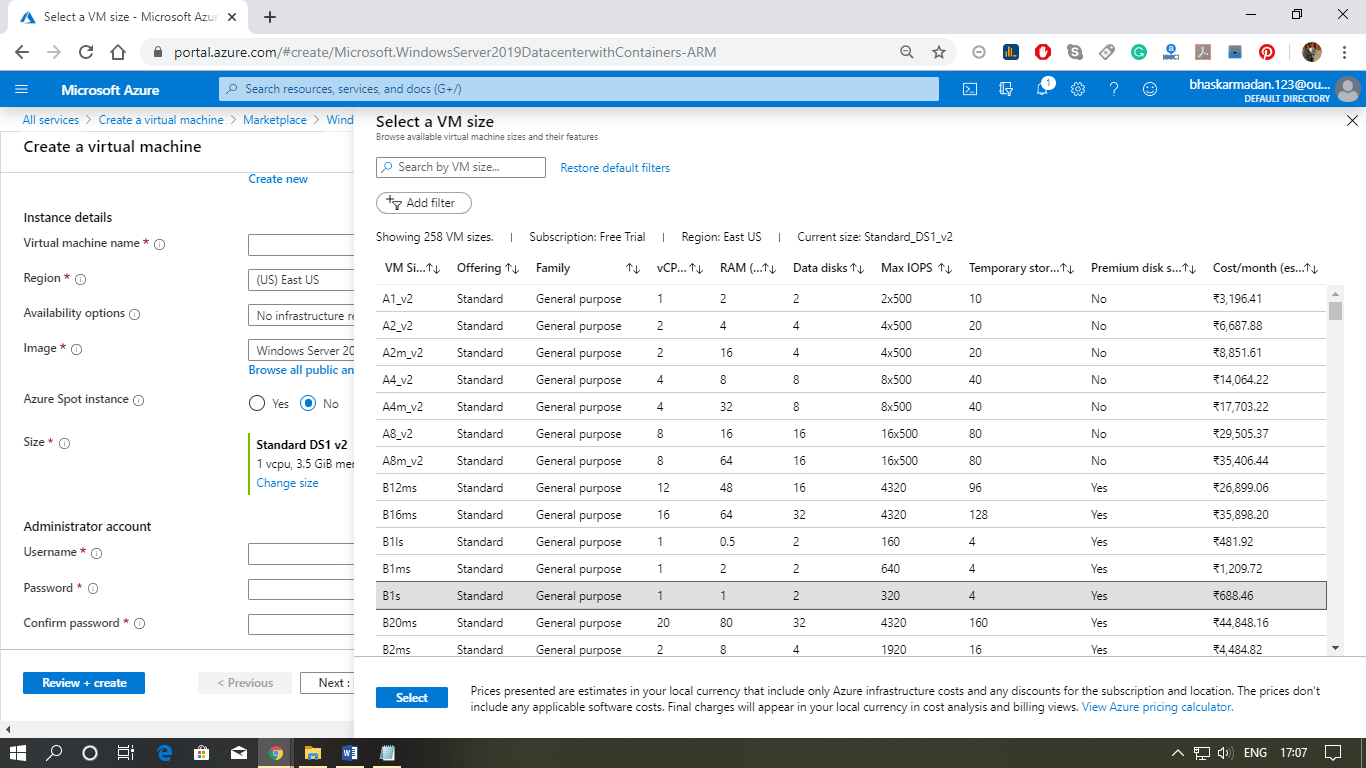
Step 5: Now select the size and type of VM according to your requirements. After that, set a User name and password for your Virtual Machine then click next.
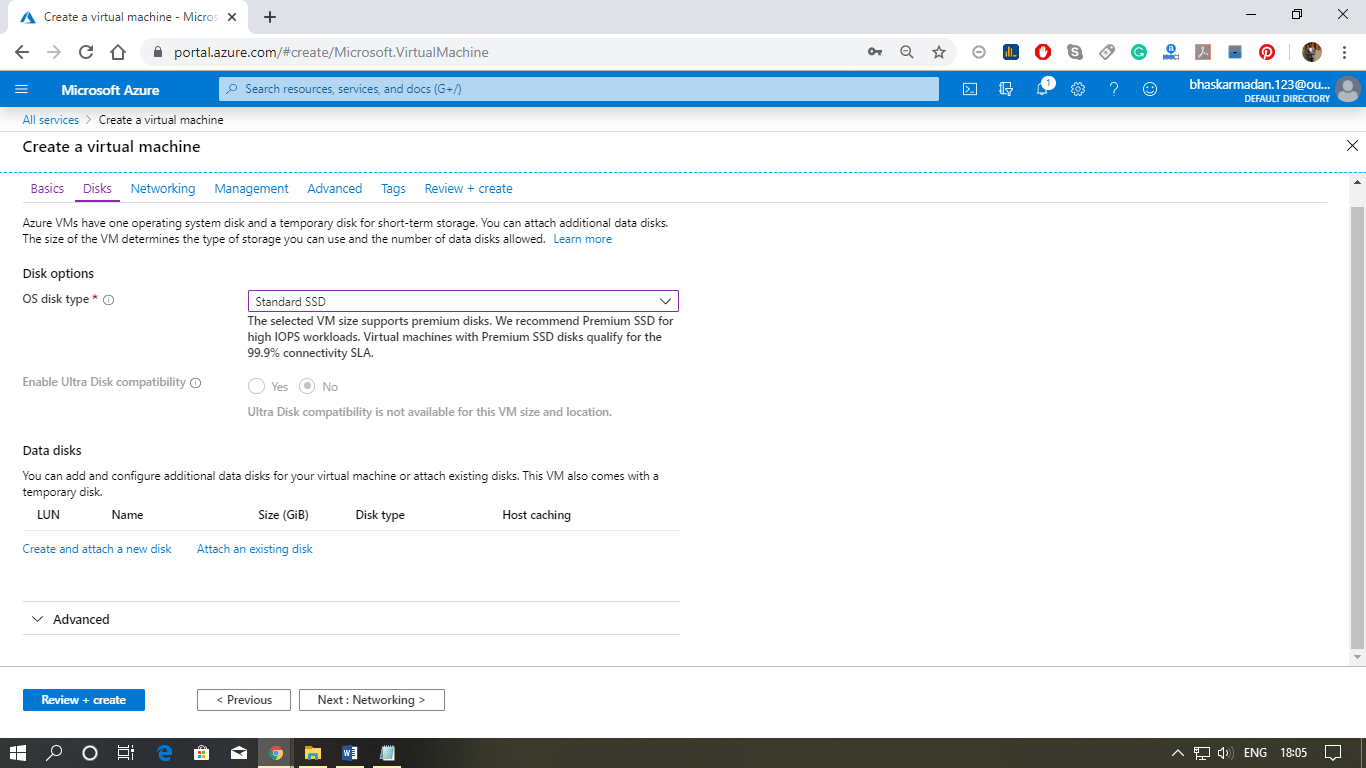
Step 6: You are on the disk tab now, Select the disk type you need then click next to redirect on the networking page.
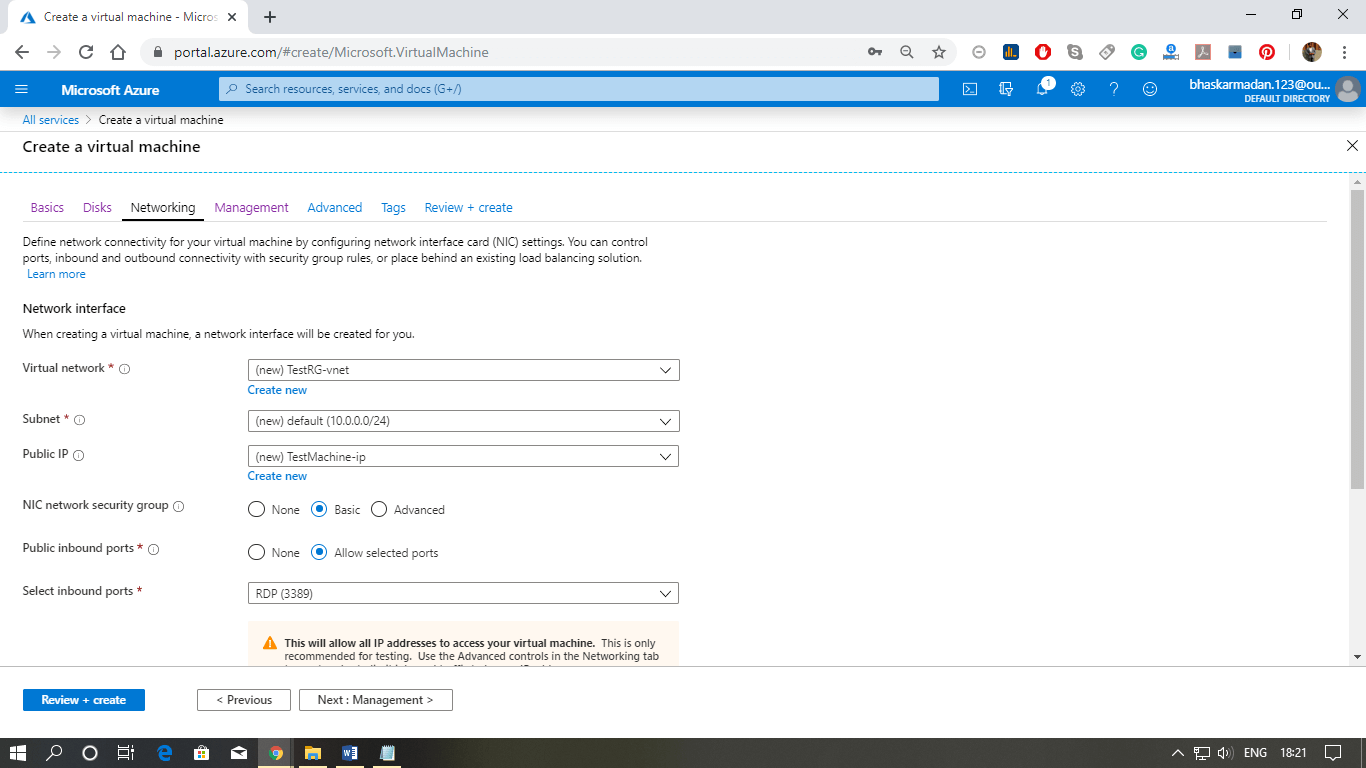
Step 7: Select the virtual network, subnet, and IP address for the Virtual machine. We are leaving it as default because we are creating it for the training purpose.
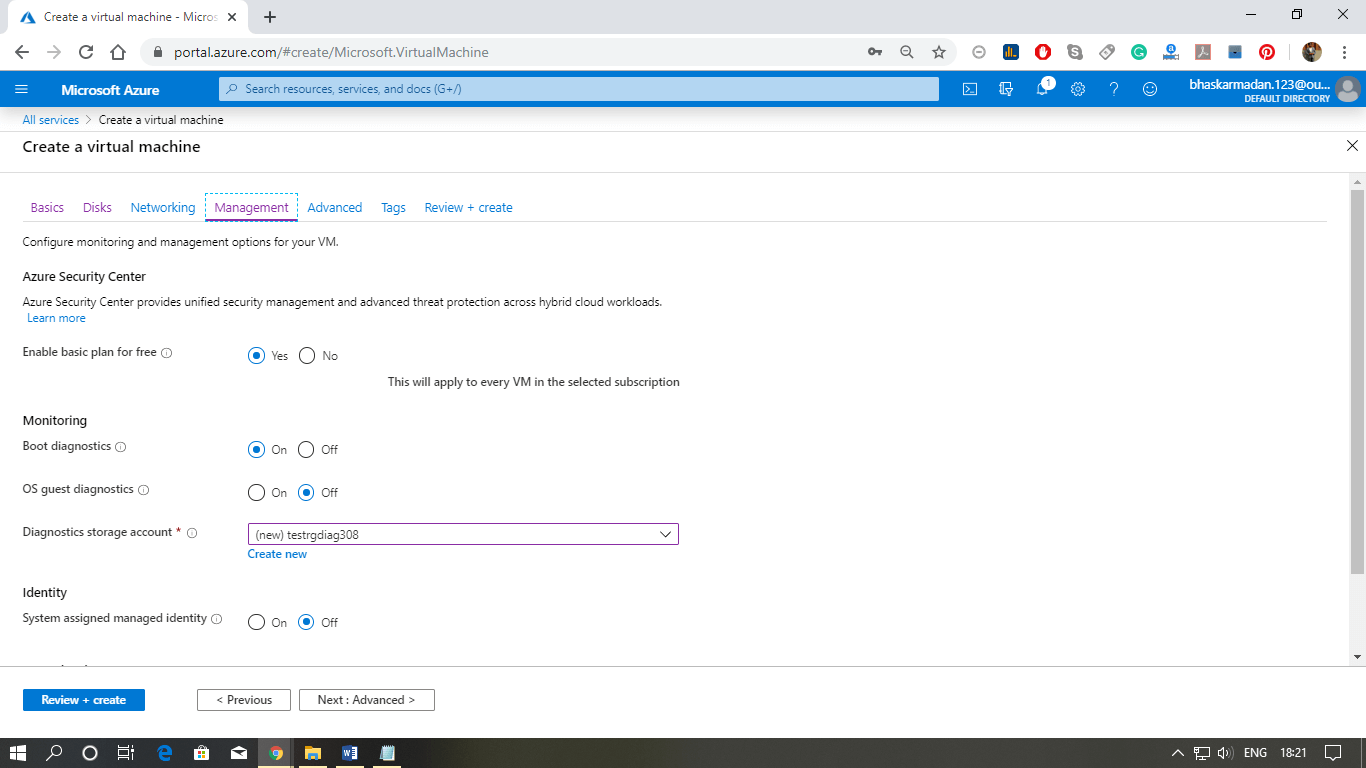
Step 8: Now select the management tab, and choose the boot and OS diagnostic option. Then click next.
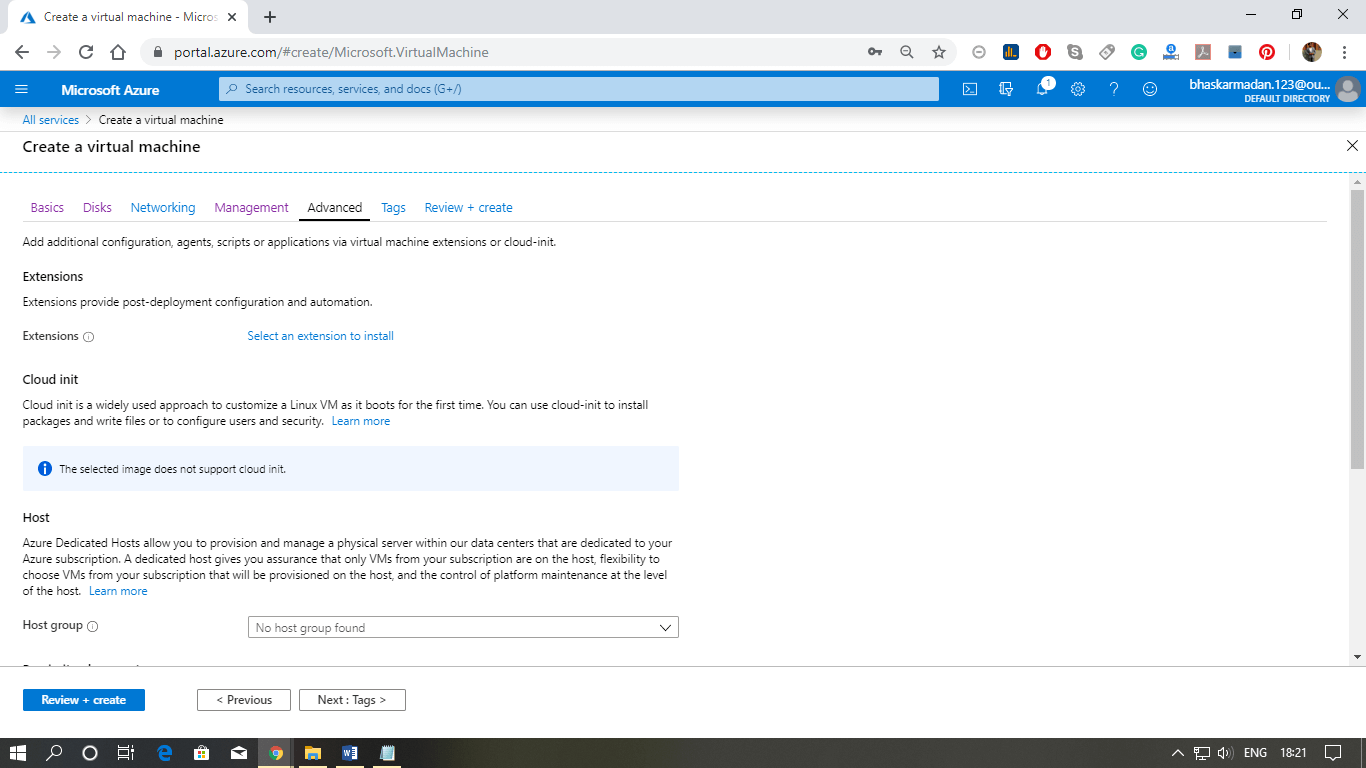
Step 9: In advanced settings, you can embed an extension to the virtual machine.
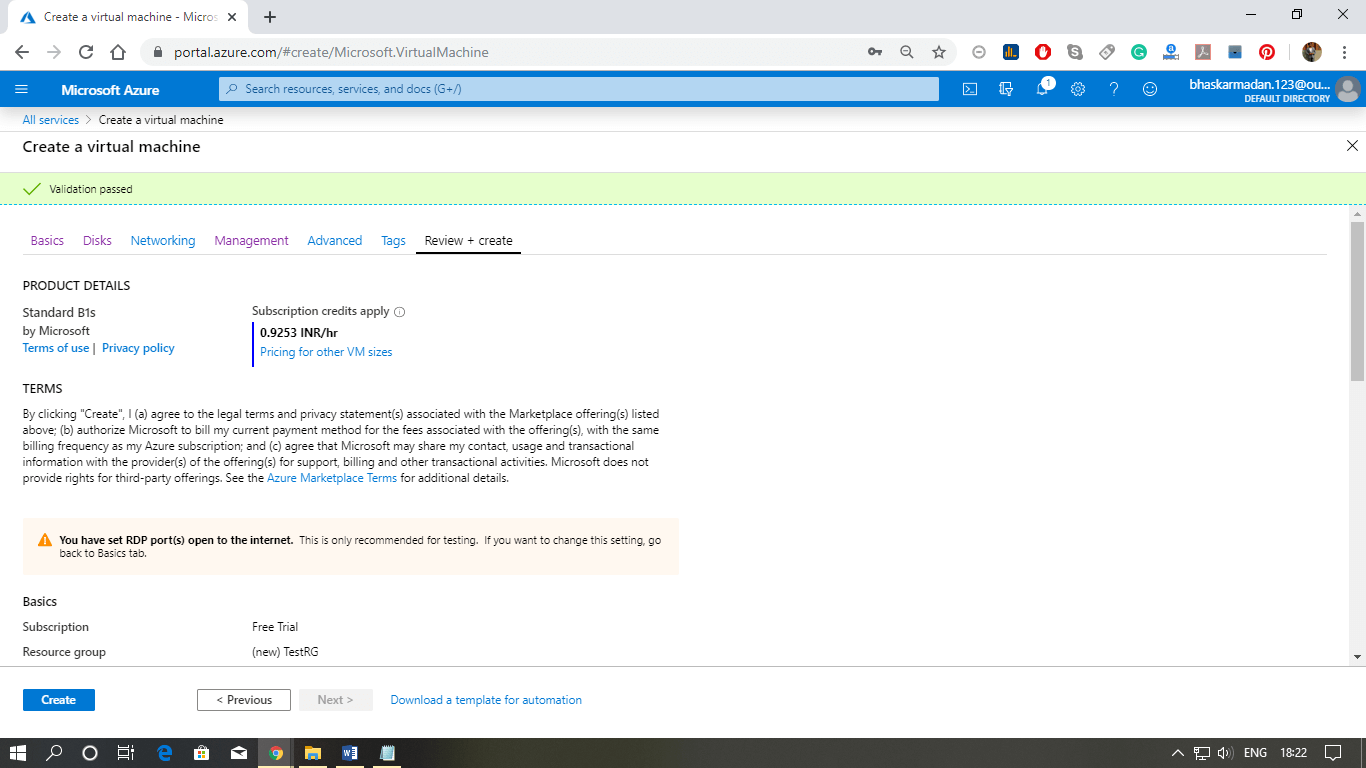
Step 10: Now, on the review and create a window, click on the create button.
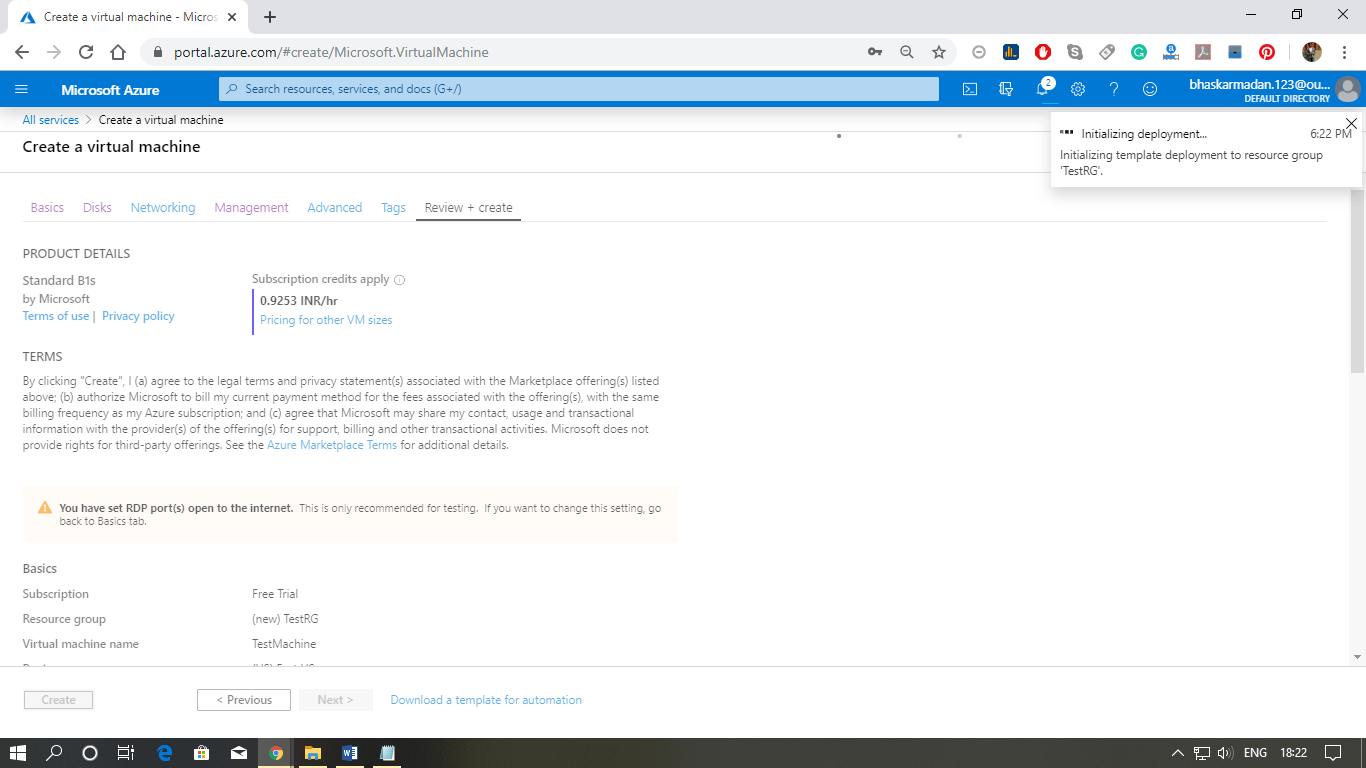
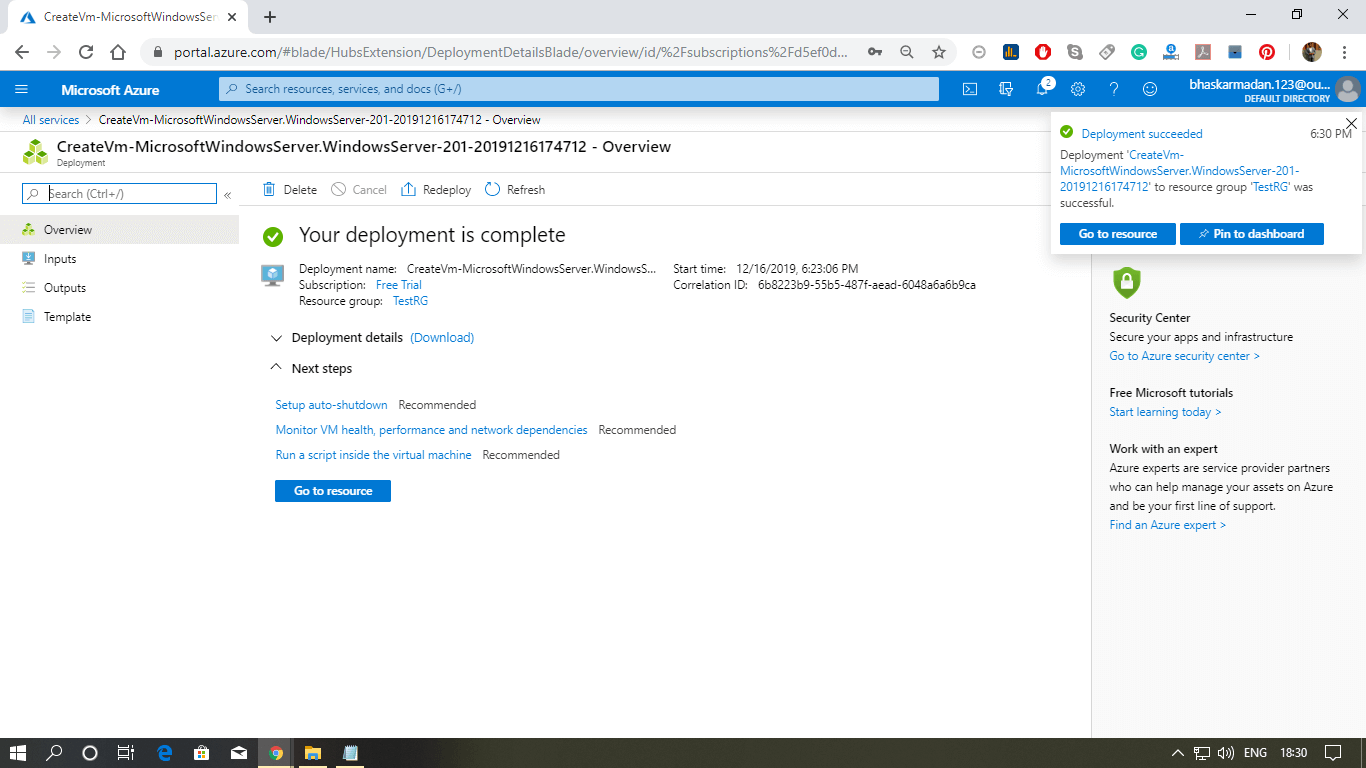
Step 11: When you click on Create, the further process will start. Wait for a few minutes to complete the processing.
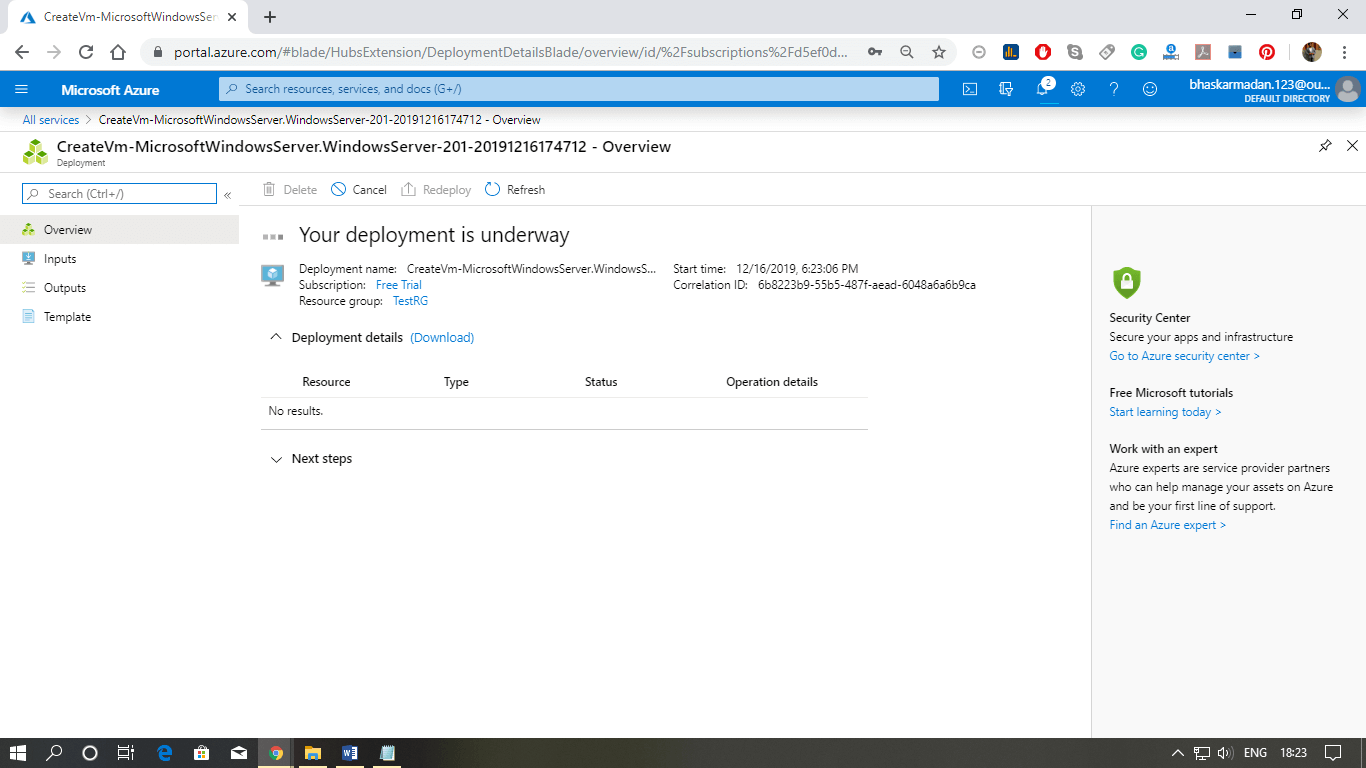
When your Virtual Machine is created, the following window will appear. You can now use your virtual machine.

Comments
Post a Comment